Now that I have chosen a concept to develop and laid out the package for it, I can start the physical build. Now the fun stuff begins!
Here's a few shots of putting the model armature together.

Setting up the right size for the main base board. I had a plan view of the yacht o the paper, and this is the point where I decided I needed to rescale the project. Similar overall dimensions but at a more dramatic scale.

The plan view of the yacht, trimaran arms included. These were later removed as they would not sit on the waterline.

Prelim shaping of the foam to fit the model base board.

Gluing the model base board (on top) to the foam. Will then be flipped over when positioned on the armature.
Scribing a 10mm grid over the armature base. I made the centreline a bit heavier so it would be easier to see as I'm modelling.

Shaping out a few more contours of the primary hull. The armature board has been sealed with two coats of shellac.

Working on the model stands. They are pinned with dowels on the top and bottom and fit into corresponding holes on the base of the model and top of the armature base.

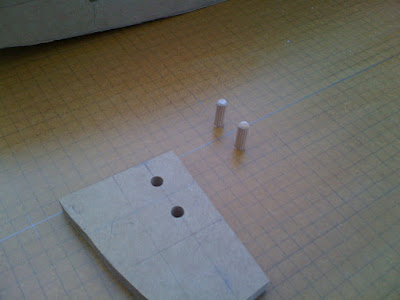
Close up of the pins on the armature base. I lined up their centres (x-axis) with the grid. I dont think it is crucial at this stage, but thought it was a good idea to keep everything referenced to the grid. Small piece of mdf is a template I made to help dril the pin holes on all the surfaces.

Detail showing the blocks with pins attached, and the holes in the base of the model board. Plants are looking a bit tired.

Blocks finished. This shows the base of the model (the waterline) sitting at 120mm from the armature base (Build Mode!). This should give me plenty of room to move when it comes to shaping the clay.

The waterline of the model sitting flush with the armature board (Presentation Mode!). By lining up the pins on the model, blocks and armature, the model will always be zero'd to the correct position.
All I need to do now is secure the 3 parts with angle brackets, so that when I start shaping the model won't move around.


No comments:
Post a Comment